
Candlemas is celebrated on 2nd February. It marks the midway point between the Winter Solstice on 21st December and the Vernal Equinox on 21st March. It is certainly a time when we feel more light entering our lives, but we are not yet out of the darkness and can benefit from candlelight a little longer. The days are steadily lengthening; with the sun now rising before breakfast and we note early signs of spring, including the welcome sight of the first snowdrops (also known as Candlemas Bells), which bring with them, the hope of spring and the longer and lighter days to come.

I spied these beauties on my morning walk – what a joy!
In Christian terms, Candlemas is a celebration of “the Feast of the Presentation of Christ in the Temple” in Jerusalem 40 days after his birth. In Luke 2:32, Simeon phophesises that Jesus would be “a light of revelation”. In the Catholic Church, it is also a celebration of the “Feast for the Purification of the Blessed Virgin Mary”, marking the end of a forty day period of purification for Mary after Jesus’s birth. In Eastern churches, Candlemas is traditionally the time when families bring new candles into Church to be blessed.
Candlemas follows close on the heels of Imbolc (February 1st). Imbolc is celebrated by both the Celts as “the Feast Day of St Brigid” (patron saint of midwives and new borns amongst other things) and by Pagans – who celebrate Brigid, Goddess of Fertility. It marks the start of the lambing season and the blooming of the blackthorn. Traditionally candles and fires were lit at this time to represent the increasing power of the sun.
In the United States and Canada the 2nd of February is known as Groundhog Day According to folklore, if it sunny when the groundhog emerges from his den, he will be scared by his shadow and retreat back to his den and winter will continue until the spring equinox, but if it is a cloudy day, the groundhog will stay outside and spring will come early. This is also mentioned in the Candlemas song my daughters have been singing a lot lately. 🙂
“When Candlemas Day is bright with sun
Then Winter has but half begun
But when Candlemas Day is dull with rain
Winter’s power is on the wain“
Here it was mainly a cloudy day with a few showers and a little sunshine in the morning, so it looks like we are in for a mixed weather forecast (very typically English!) A little snow would be sooooo welcome here before spring returns!
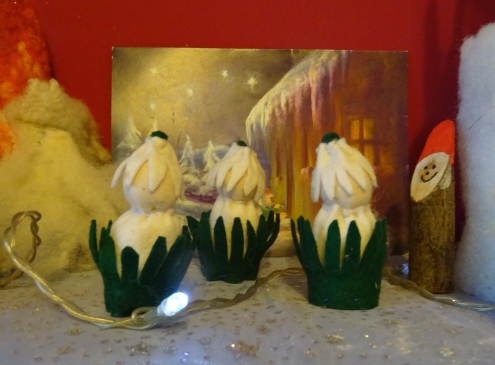
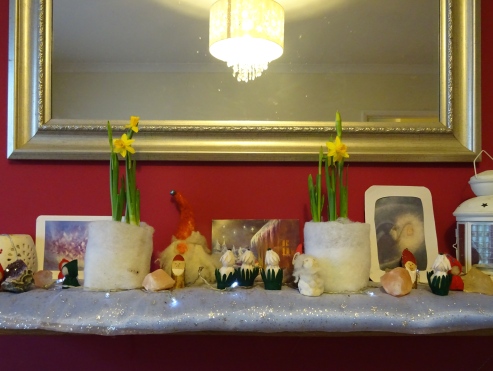
On the Nature table are the very first signs of spring, including these snowdrop children and some “snow” covered daffodils 🙂
In our (Waldorf) school, the children wear light blue for the Candlemas assembly, to echo the colour of the sky at this time of year and the return to light after a long time of darkness (and the dark purples and blues of the other winter festivals). The Kindergarten children made candles: in the past my daughters have made earth candles (by making a hollow in the earth, placing a wick in it and pouring melted beeswax into the hollow) and rolled beeswax candles.
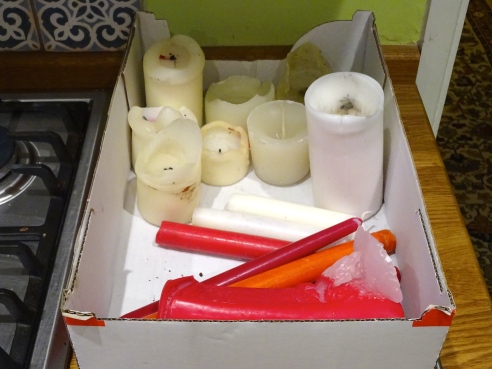
At home we usually roll our own beeswax candles on Candlemas day, but this year I didn’t store the beeswax sheets well (they were outside in our cold garage), so the wax got too brittle and broke into pieces. 😦 So I decided this year we would recycle our old candles instead. Over the years, I have amassed a large number of old candles in a box in the garage. My husband has probably wondered on many an occasion what I was going to do with them all! – I do tend not to throw things away that can be recycled. It has felt very satisfying to give these old candles a new lease of life! 🙂
I used old jam jars and terracotta pots from the garden as candle holders. My daughters wanted me to make them a scented white candle each for their rooms. I chose ylang ylang essential oil as we all like it.

We started making the candles on Candlemas day, but melting the wax takes time and there was only really an hour to do it in between my daughters returning from school and before starting dinner (rolling beeswax candles is such instant gratification, we missed doing it!), so I resumed candle making again this morning.
It is evening now and I have made eight new candles in total including three large citronella scented candles in terracotta pots (to keep the bugs away this summer), three white(ish) candles in glass jars and this evening I just finished a multi-coloured candle in a glass jar and have one more layer of wax to go on a teacup candle. It’s fun experimenting with different containers and techniques and so rewarding to create something new and useful out of an item that has reached the end of its functional life!
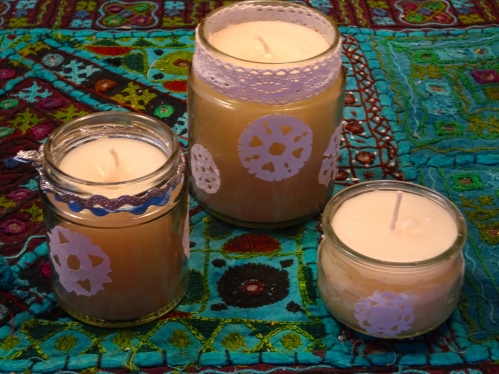
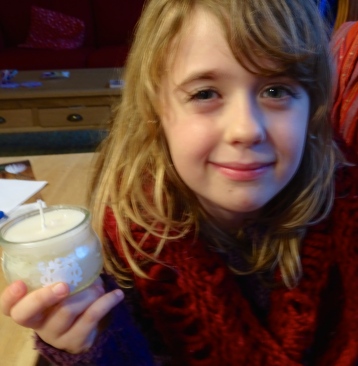
Here are the white candles decorated with ribbons and snowflakes 🙂
To make candles, you need a double boiler system that is used solely for this purpose (melting wax is a messy business!). I used an old saucepan and a glass bowl. I think next time I would like to use a large metal jug to help make the pouring less messy (I used an old tin can to transfer the wax this time) and perhaps a bigger pan to do larger quantities. Ideally I would take it all outside over an open fire to save all the cleaning up. You live and learn 🙂
I thought I would share how I made the candles with you. I know there are lots of great tutorials out there, but in the spirit of sharing, I thought I would show you how I made my candles and what I have learnt in the process (to save you making the same mistakes!) 🙂
To make recycled candles, you will need:
Wicks – prewaxed are ideal. The thickness depends on the container ie thin wicks are for tealights and tiny candles. I used a medium sized wick for all of mine, I think. If you choose a very large container eg a bucket, several wicks would be better.
Tabs – little flat metal pieces to put the wick through. They sit at the bottom of the container.
Candles to recycle
Containers – jam jars, tins, cups, buckets, terracotta pots etc etc…
Before you start, cover all your surfaces with greaseproof paper or aluminium foil for protection and to help with cleaning.
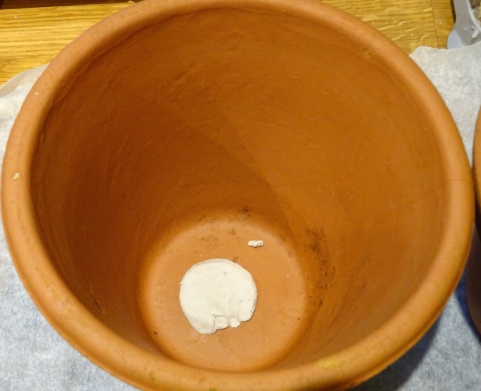
If you are using terracotta pots, you will need to close the hole to stop the wax from leaking out. We used air drying clay, but gaffer tape is also fine.

Cut your candles up. I found cutting them at an angle with a knife worked well. Some people use hammers.
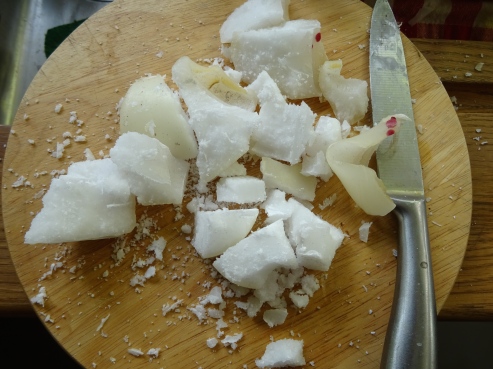
I cut the candles into small pieces to speed up the melting time.
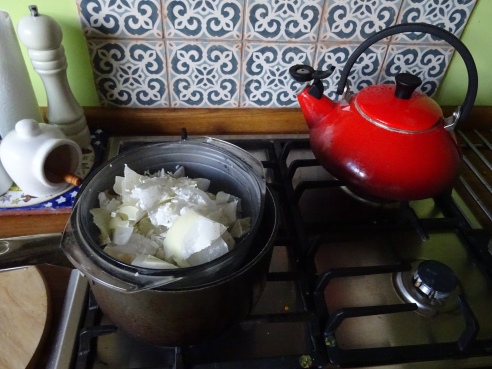
Here is my improvised double boiler :-). Stir the wax every now and then with a metal spoon that you can dedicate solely to this purpose. It also speeds the melting time up.
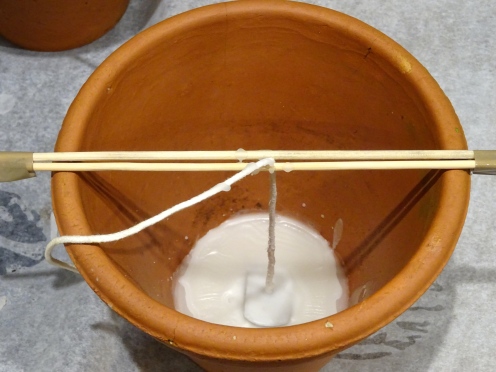
Insert the wick into the tab. Cut the wick a couple of inches longer than the length of your container. If the wick isn’t prewaxed, dip it in some melted wax so it becomes more erect. Hold the wick in a central position by using two bamboo skewers that are taped together at the sides. Pour a little melted candle wax in the bottom of the container to keep the tab in place.
When you pour the candle wax into the container, take care to avoid the wick and the sides of the container – you save yourself a lot of cleaning up later!
I had to pour my candles in stages as I only had a small double boiler system. If you are only half filling your container, then use a skewer to make little holes in the wax before filling the rest of the container.( I read this somewhere many years ago and have had good results so I keep on doing it!).
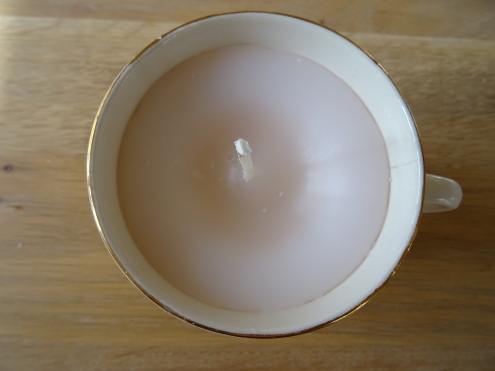
When I filled a container all at once, like this teacup candle, there was a quite a marked dip in the middle once the wax had set. This is normal and easily remedied by pouring some more melted wax on top (remembering to make some skewer holes as before).
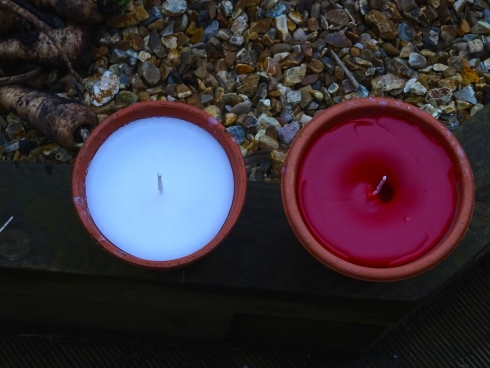
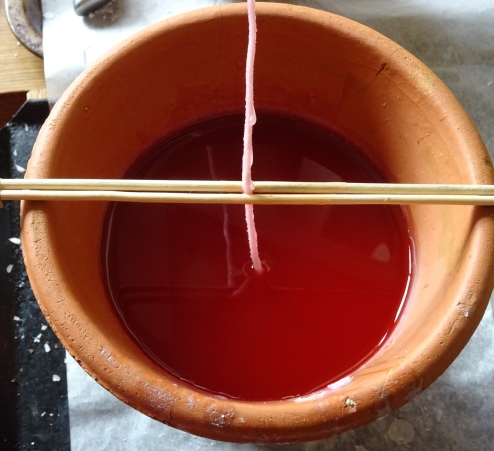
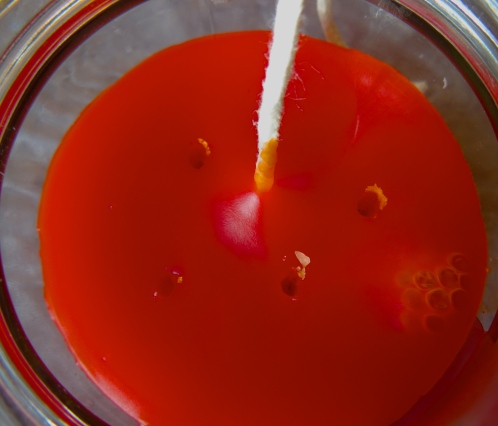
Consider where you would like to leave your candles to set and ideally pour the wax there. If you move the candles after pouring, they are apt to get some pitting, as you can see with the red candle above which I moved outside. Once I lit the candle the pitting disappeared, but if you are giving a candle as a gift, I would leave the candle to set where it is.
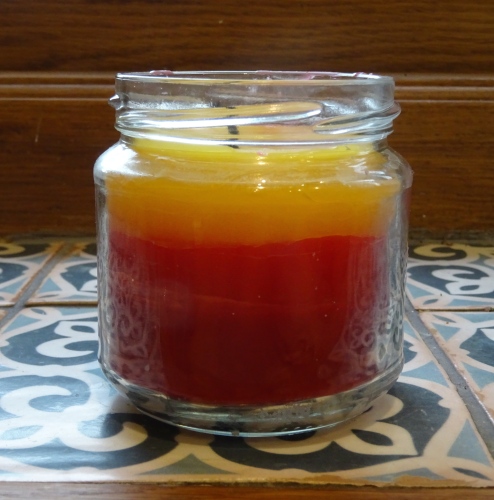
If you would like to make a layered candle with different colours, pour in one colour at a time and let it set (a couple of hours seems enough). Use a skewer to make holes, as above and then add the next layer and so forth. Here is one I made earlier 🙂
You can add a scent of your choice once your wax has melted and you have turned off the heat. Use as much as you like.
The candles take around four hours to fully set. Once you are satisfied, cut the wick to around 2cm in length and enjoy!
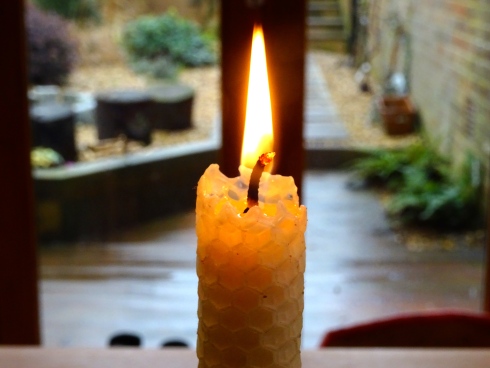
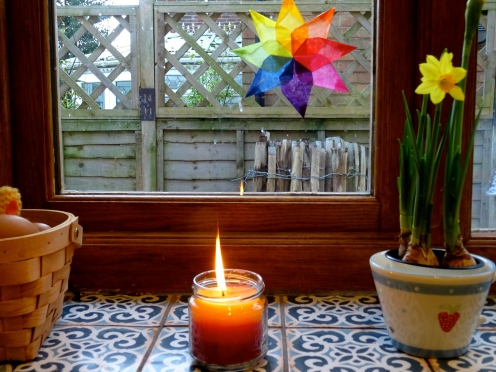
There is nothing so peaceful and hypnotic as watching the flicker of candlelight.
When my daughters returned from school, we decided to decorate our jam jar candles with tiny paper snowflakes and ribbons to make them extra pretty. 🙂
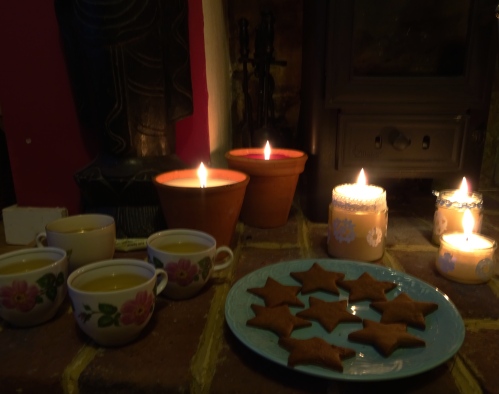
I thought it would be nice to have a cosy belated Candlemas celebration after school today, so I baked these gingerbread biscuits in star shapes, inspired by one of our favourite winter books The Sea Mice and the Stars.
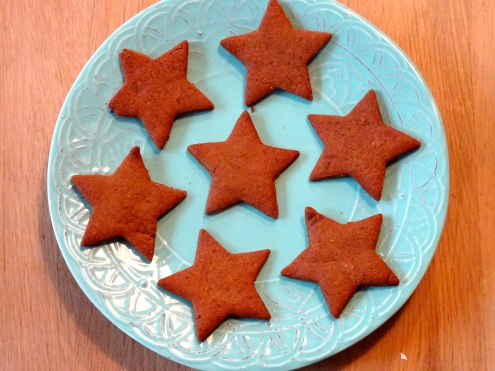
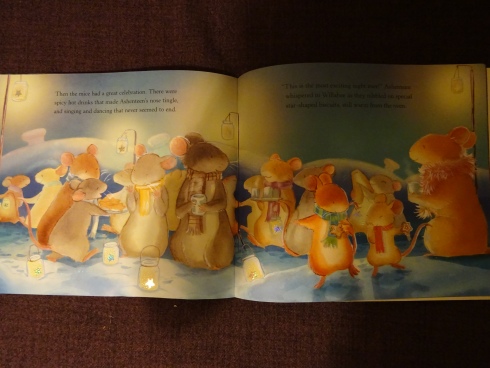
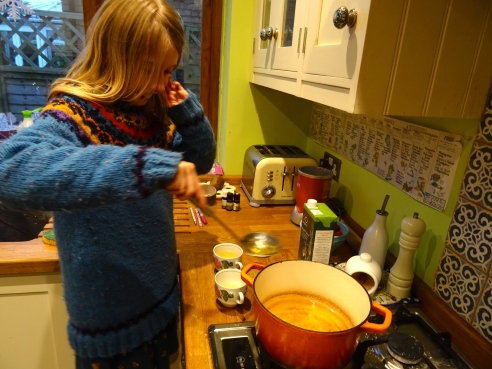
In the book, the little mice enjoy star shaped biscuits and “spicy hot drinks that made their noses tingle”, so my eldest daughter made us some mulled apple juice to go with the biscuits ( watered down apple juice with cinammon, cloves and star anise).
We lit our candles and had a cosy time reading this much loved story.
I am planning to share a list of our favourite winter books here shortly. It is only half way through winter after all, so there is plenty more time for sharing heartwarming stories with your children this winter. 🙂
I hope you are enjoying all that the season has to offer. Wishing you love and light.
Sharing at Frontier Dreams KCCO and The Really Crafty Link Party


Thanks for all the tips on making candles! I’ve been thinking of getting out some of the little spring flower folks here, too. The bulbs are sending up their leaves in all this mild weather.
LikeLike
Oh I love it when all the spring folk arrive on the nature table :-). Last year we had daffodils at Christmas time. Am glad it’s not as mild here this year – it felt very wrong and there was less to come in the spring too. Thanks for stopping by!
LikeLike
I’ve read about Candlemas in historical romances before but, to be very honest. I realized I didn’t know the full story behind it until I saw your post, so thank you for sharing it, and also for the very useful tutorial on how to recycle old candles. Thank you for joining the Really Crafty Link Party this week too. Pinned!
LikeLike
Ah thanks Teresa. Glad you enjoyed it!
LikeLike
We celebrate Candlemas by making candles and crafting. We made story-tellers this year, sharing the change of seasons. Sweet snowdrop people on your nature table. #KCCO
LikeLike
Thanks very much Cheryl. I just popped over to your blog and its wonderful and I love the storytellers. There is always so much to celebrate throughout the year, so much beauty to enjoy.
LikeLike
I hope to make candles again sometime soon. Thanks for the skewer holes tip. I will have to try that next time.
LikeLike
Good luck with that! Best Wishes
LikeLike